

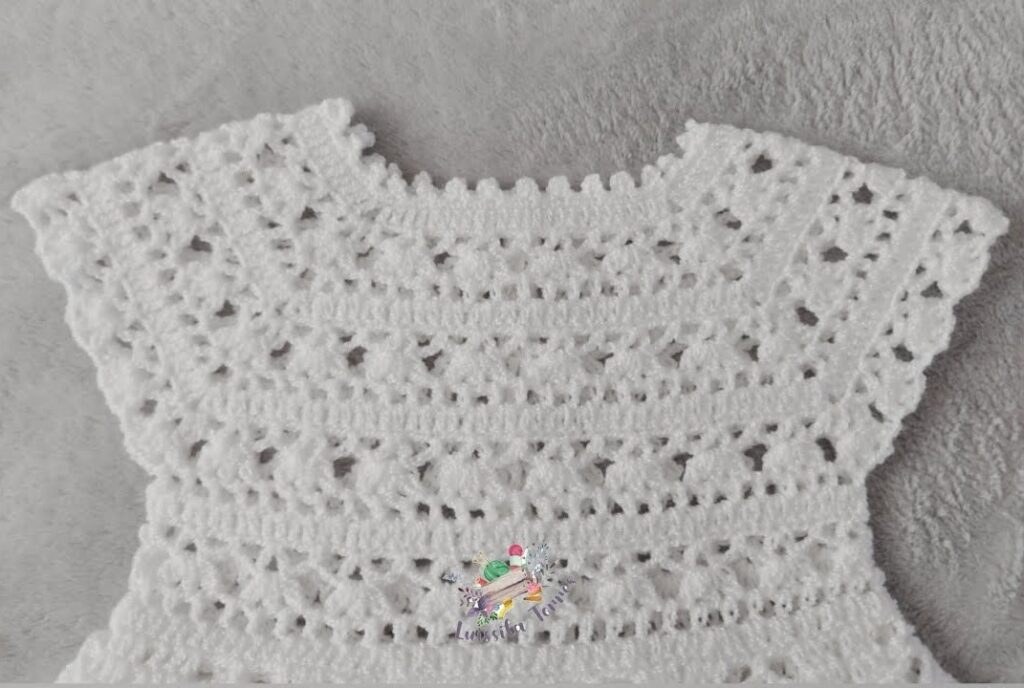
A yoke is typically divided into 4 sections: 2 back panels, 2 sleeves, and 1 front panel. Increases are made at 4 “corner” points to create the circular shape.
For 56 stitches, a good division is:
- Back Panel 1: 8 stitches
- Sleeve 1: 10 stitches
- Front Panel: 20 stitches
- Sleeve 2: 10 stitches
- Back Panel 2: 8 stitches (8 + 10 + 20 + 10 + 8 = 56 stitches)
Row 2 (First Increase Row):
- Hdc in first st. Hdc in next 7 sts. (Right Back Panel)
- (Inc hdc in next st, ch 1, Inc hdc in next st) in next st (Corner 1). Place a stitch marker in the ch-1 space.
- Hdc in next 10 sts. (Right Sleeve)
- (Inc hdc in next st, ch 1, Inc hdc in next st) in next st (Corner 2). Place a stitch marker in the ch-1 space.
- Hdc in next 20 sts. (Front Panel)
- (Inc hdc in next st, ch 1, Inc hdc in next st) in next st (Corner 3). Place a stitch marker in the ch-1 space.
- Hdc in next 10 sts. (Left Sleeve)
- (Inc hdc in next st, ch 1, Inc hdc in next st) in next st (Corner 4). Place a stitch marker in the ch-1 space.
- Hdc in next 7 sts. Hdc in last st (Left Back Panel).
- Ch 2, turn.
Row 3 (Consistent Increase Row):
- Hdc in first st. Hdc in each hdc until you reach the first ch-1 space (your stitch marker).
- (Inc hdc in ch-1 sp, ch 1, Inc hdc in ch-1 sp) in ch-1 sp (Corner 1). Move your stitch marker to the new ch-1 space.
- Hdc in each hdc until you reach the next ch-1 space.
- (Inc hdc in ch-1 sp, ch 1, Inc hdc in ch-1 sp) in ch-1 sp (Corner 2). Move your stitch marker.
- Hdc in each hdc until you reach the next ch-1 space.
- (Inc hdc in ch-1 sp, ch 1, Inc hdc in ch-1 sp) in ch-1 sp (Corner 3). Move your stitch marker.
- Hdc in each hdc until you reach the next ch-1 space.
- (Inc hdc in ch-1 sp, ch 1, Inc hdc in ch-1 sp) in ch-1 sp (Corner 4). Move your stitch marker.
- Hdc in each hdc until the end of the row. Hdc in last st.
- Ch 2, turn.
Repeat Row 3 for a total of 5-7 rows (including Row 2). The number of rows will determine the depth of your yoke. For 6-9 months, 5-6 increase rows (total 6-7 yoke rows) should be sufficient to reach approximately 4.5-5 inches depth.
- After 6 total yoke rows (Row 1 + 5 increase rows): You will have approximately 56 + (5 * 8) = 96 hdc stitches, plus the 4 ch-1 spaces.
Measuring Your Yoke:
- Yoke Depth: Lay the yoke flat. Measure from the base of the initial chain to the stitch marker in the corner ch-1 space. It should be approximately 4.5-5 inches.
- Total Yoke Circumference: Measure the circumference at the widest part of the yoke (along the line of your stitch markers). It should be around 18-20 inches.
Next Steps: Dividing for Armholes and Body
Once your yoke is complete, the next step is to separate the sleeves from the body.
Next Row (Joining for Body):
- Ch 2 (counts as hdc). Hdc in each hdc until you reach the first ch-1 space (Corner 1).
- Hdc 1 in the ch-1 space.
- Ch 2 (this creates the underarm chain for the sleeve).
- Sk ALL sts between this corner and the next corner (Sleeve 1 stitches).
- Hdc 1 in the next ch-1 space (Corner 2).
- Hdc in each hdc across the Front Panel until you reach the next ch-1 space (Corner 3).
- Hdc 1 in the ch-1 space.
- Ch 2 (this creates the second underarm chain for the sleeve).
- Sk ALL sts between this corner and the next corner (Sleeve 2 stitches).
- Hdc 1 in the next ch-1 space (Corner 4).
- Hdc in each hdc until the end of the row.
- Now, join the ends of the row to form a continuous circle for the body: Sl st into the top of the beg ch-2.
Video tutorial:
After this row, you will work in rounds for the body of your garment (dress, sweater, or cardigan). The sleeves are now separated, and you can add chains for armhole flexibility as needed.
Tips for a Perfect Yoke:
- Count Carefully: Yokes rely on precise stitch counts, especially at the increase points. Double-check your stitches in each row.
- Use Stitch Markers: They are invaluable for easily identifying your increase points and saving you from recounted!
- Consistent Tension: Try to maintain even tension throughout your work for a smooth, symmetrical yoke.
- Try On/Measure Regularly: If you’re adapting this for a different size, frequently measure against the person or a garment that fits well.
- Adjusting Size:
- Smaller Yoke: Start with fewer initial chains and/or fewer increase rows.
- Larger Yoke: Start with more initial chains and/or more increase rows. You might also add 1-2 more chains for the underarm (ch 3-4 instead of ch 2) for very large sizes.
You’ve now mastered the foundation of many beautiful crochet garments! From this perfectly shaped yoke, you can easily transition into the body of a dress, the front and back of a cardigan, or a cozy baby sweater. Happy crocheting! Sources
