Crochet Strawberry Keychain Pattern: 12 Quick Rounds
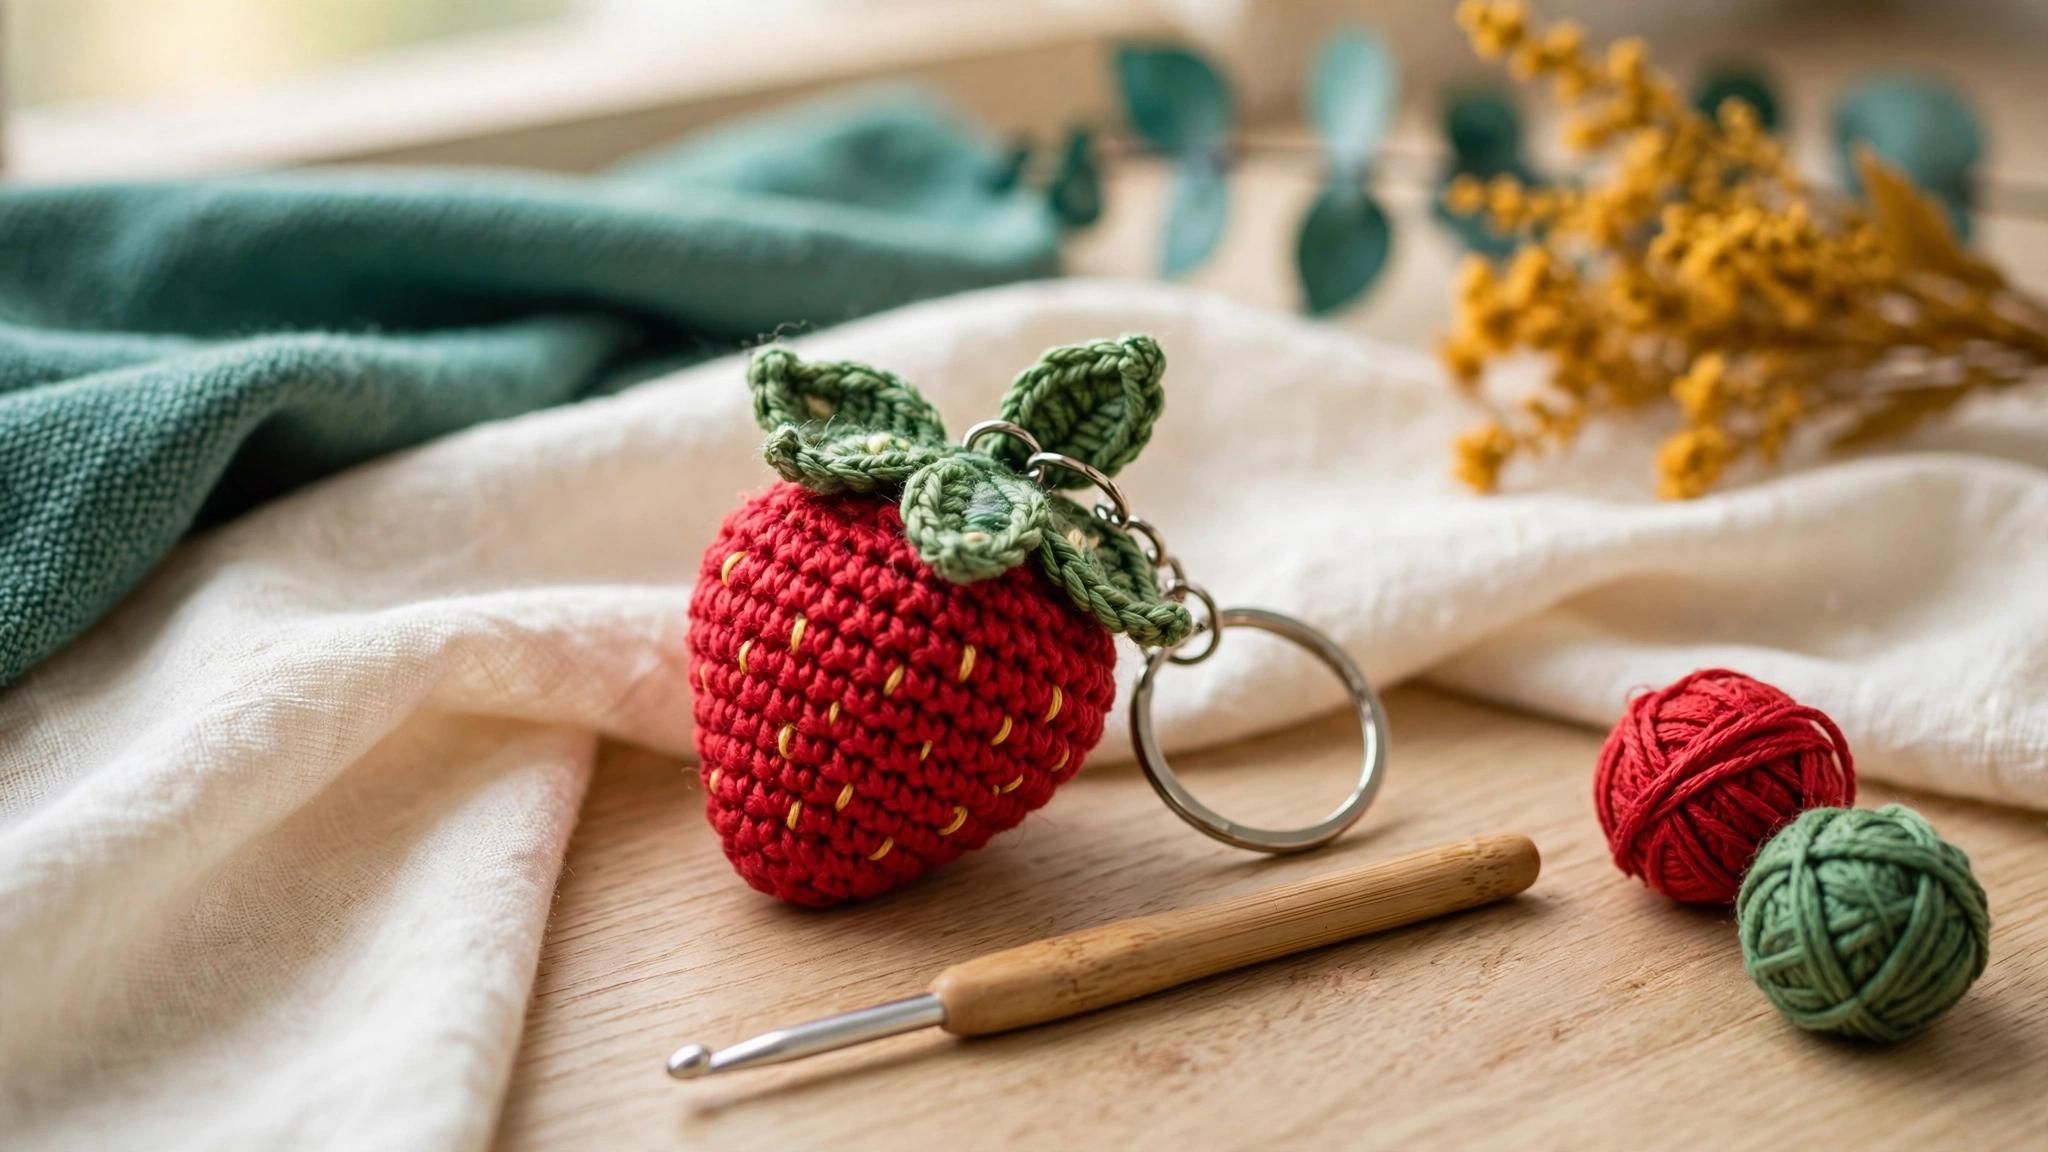
This strawberry is worked in continuous rounds from the pointed tip to the flat top, so there is nothing to sew except the leaves. Every round below ends with its stitch count, so you can check your work as you go.
- Skill level
- Easy – you need sc, inc and dec
- Yarn
- DK or light worsted cotton, red + green
- Hook
- 3.0 mm (US C/2 or D/3)
- Pieces
- 2 (berry body, leaf top)
- Finished size
- About 4.5 cm (1.75 in) tall
- Method
- Amigurumi in continuous spiral rounds
- Time
- 40–60 minutes
- Use
- Keychain, bag charm, zipper pull
Working in a spiral
Do not join rounds with a slip stitch. Place a stitch marker in the first stitch of each round and move it up as you go.
Materials, Gauge & US Crochet Terms
- Red cotton yarn, about 8 m (9 yd)
- Green cotton yarn, about 3 m (3 yd)
- Yellow embroidery floss or scrap yarn for seeds
- 3.0 mm crochet hook
- Fiberfill stuffing (a small handful)
- Keyring with jump ring or lanyard clip
- Stitch marker, tapestry needle, scissors
Gauge: Gauge is not critical for a charm, but work tightly so the stuffing does not show through. After Round 5 your circle should measure about 3 cm across.
This pattern uses US crochet terms. Not sure about your hook? See the hook size chart.
Open the stitch abbreviations+
- MR
- magic ring
- ch
- chain
- sc
- single crochet
- inc
- increase: 2 sc in the same stitch
- dec
- decrease: single crochet two together (invisible decrease recommended)
- sl st
- slip stitch
- st(s)
- stitch(es)
- R
- round
- BLO / FLO
- back loop only / front loop only
Step 1: Start the berry tip
With red yarn, make a magic ring. The tip of the strawberry is the narrowest point, so we increase gently.
- R1: 6 sc into the MR, pull the ring closed. (6)
- R2: (sc, inc) × 3. (9)
- R3: (2 sc, inc) × 3. (12)
- R4: (3 sc, inc) × 3. (15)
- R5: (4 sc, inc) × 3. (18)
Step 2: Work the body even
- R6–R8: sc in each st around. (18)
Now add the seeds. Thread yellow floss on a tapestry needle and make small straight stitches over one strand of red, scattered evenly. Adding them now, before stuffing, keeps the knots hidden inside.
Step 3: Stuff and close the top
- R9: (4 sc, dec) × 3. (15)
- Stuff firmly, pushing filling into the tip first.
- R10: (3 sc, dec) × 3. (12)
- R11: (2 sc, dec) × 3. (9)
- R12: (sc, dec) × 3. (6)
Fasten off, leaving a 15 cm tail. Weave the tail through the front loops of the last 6 stitches and pull tight to close. Do not cut yet; you will use this tail to secure the leaves.
Step 4: Crochet the leaf top
With green yarn, make a magic ring.
- R1: 5 sc into the MR, sl st to the first sc to join. (5)
- R2: *ch 4, sl st in 2nd ch from hook, sc in next ch, hdc in last ch, sl st in next sc of R1*; repeat from * 4 more times. (5 leaves)
- For the stem: ch 4, sl st back down the 4 chains. Fasten off with a 15 cm tail.
Step 5: Attach the leaves and keyring
- Center the leaf piece over the closed top of the berry so the stem points up.
- Using the green tail, whipstitch the center ring to the berry, then tack each leaf tip down with one small stitch.
- Slide the jump ring through the base of the stem and close it with pliers.
- Weave in all ends by passing them through the body and trimming flush.
Troubleshooting & Quick Answers
| Problem | Fix |
|---|---|
| Stuffing shows between stitches | Go down half a hook size or use the yarn-under single crochet. |
| The berry leans to one side | Your increases are stacking. Offset them by starting R3 and R5 with the inc instead. |
| Magic ring keeps opening | Pull the tail tight, then weave it back through the first round in the opposite direction. |
Can I use acrylic yarn?
Yes. Acrylic gives a softer, fuzzier berry. Cotton gives crisper stitches that hold up better on a keychain.
How do I make it bigger?
Use worsted yarn and a 4.0 mm hook. The stitch counts stay the same and the berry grows to about 6 cm.
Is it safe for babies?
Not as a keychain. For toddlers, embroider instead of using hard parts and attach nothing removable.
Safety & accuracy notes
- Small-part warning: keyrings and jump rings are choking hazards. Keep away from children under 3.
- Pattern tested twice in cotton and once in acrylic by the Kiptax team.
Editorial accuracy: spotted an error? Tell us and include this page’s link – we review every report.
About the author
Lina
Lina writes, tests and publishes the crochet patterns and tutorials on Kiptax.
More about Kiptax
Leave a Comment
Your email address will not be published. Required fields are marked *. Comments are moderated before they appear.