

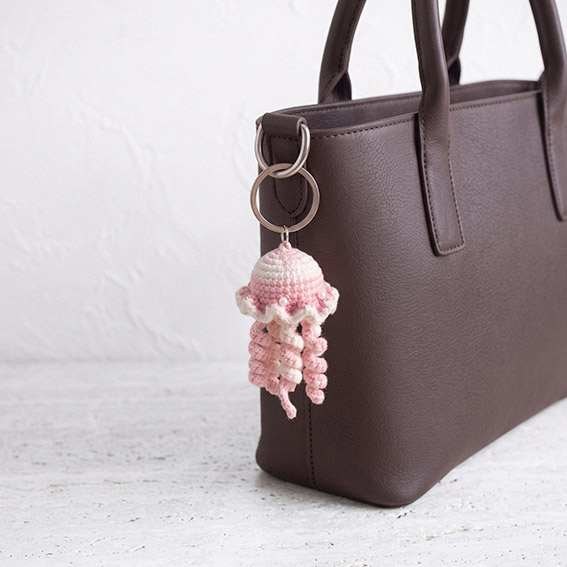
Work 6 curly tentacles directly into the two exposed front-loop ridges beneath the ruffle.
Outer Tentacles
Use the 24 exposed front loops created when Rnd 11 was worked in BLO. Mark 3 attachment loops evenly around the ridge, approximately 8 loops apart.
Tentacle 1 — Pink: Join with sl st in a marked loop, ch 18. Starting in the 2nd ch from the hook, work 2 sc in each ch across. Sl st back into the same attachment loop. Fasten off.
Tentacle 2 — White: Ch 15 and work as for Tentacle 1.
Tentacle 3 — Pink: Ch 17 and work as for Tentacle 1.
Ami_kare 300×250
Inner Tentacles
Use the 18 exposed front loops created when Rnd 12 was worked in BLO. Mark 3 attachment loops approximately 6 loops apart, positioning them between the Outer Tentacles.
Tentacle 4 — Pink: Ch 14. Starting in the 2nd ch from the hook, work 2 sc in each ch across. Sl st back into the same attachment loop. Fasten off.
Tentacle 5 — White: Ch 16 and work as for Tentacle 4.
Tentacle 6 — Pink: Ch 13 and work as for Tentacle 4.
Weave in all ends securely. Arrange the curls so the 6 tentacles hang at slightly different lengths.
Ami_esnek (yatay)
Pearl Details
Using strong matching sewing thread, sew 2 pearl beads securely to the front of the pink band between Rnds 9 and 10, approximately 6 stitches apart. Pass the thread through several neighboring crochet stitches when anchoring each bead.
Crown Detail
With pink yarn and a yarn needle, embroider 6 short radial straight stitches around the top center of the white dome, extending approximately across Rnds 1–3. Keep the stitches evenly spaced and flat against the crochet surface.
Ami_esnek (yatay)
Reinforced Keychain Eye
With pink yarn, join through a stitch at the top center of the dome.
Ch 3, then sl st into an adjacent crown stitch to form a small 3–4 mm eye.
Work 4 sl sts evenly around the ch-3 loop to reinforce it.
Fasten off, leaving a long tail. Use the tail to sew through the 2 adjacent crown stitches 3 times, securing both sides of the eye firmly. Bury the yarn end inside the Body.
Keychain Hardware
Open the 8 mm jump ring sideways with two jewelry pliers. Pass it through the reinforced crochet eye and the 25 mm split key ring. Close the jump ring completely so the cut ends meet with no visible gap.
Ami_esnek (yatay)

Assembly
- Shape the stuffed dome evenly and arrange the 6 scallops around the full circumference.
- Arrange the 6 tentacles so the pink and white curls hang freely without tangling.
- Confirm both pearl beads are securely anchored.
- Check that the reinforced top eye is anchored across 2 adjacent crown stitches and does not distort the dome when gently pulled.
- Attach the jump ring and split key ring and confirm the jellyfish hangs centered.
Copyright & Credits
This crochet pattern and all accompanying photos belong to AmigurumiAllFreePatterns.com. The written instructions and photos may not be copied, redistributed, translated, republished, or used for commercial purposes without permission. Finished items made from this pattern may be sold in small quantities with credit to AmigurumiAllFreePatterns.com.
Pick Your Favorite & Pin It
CONTENT END 1
