

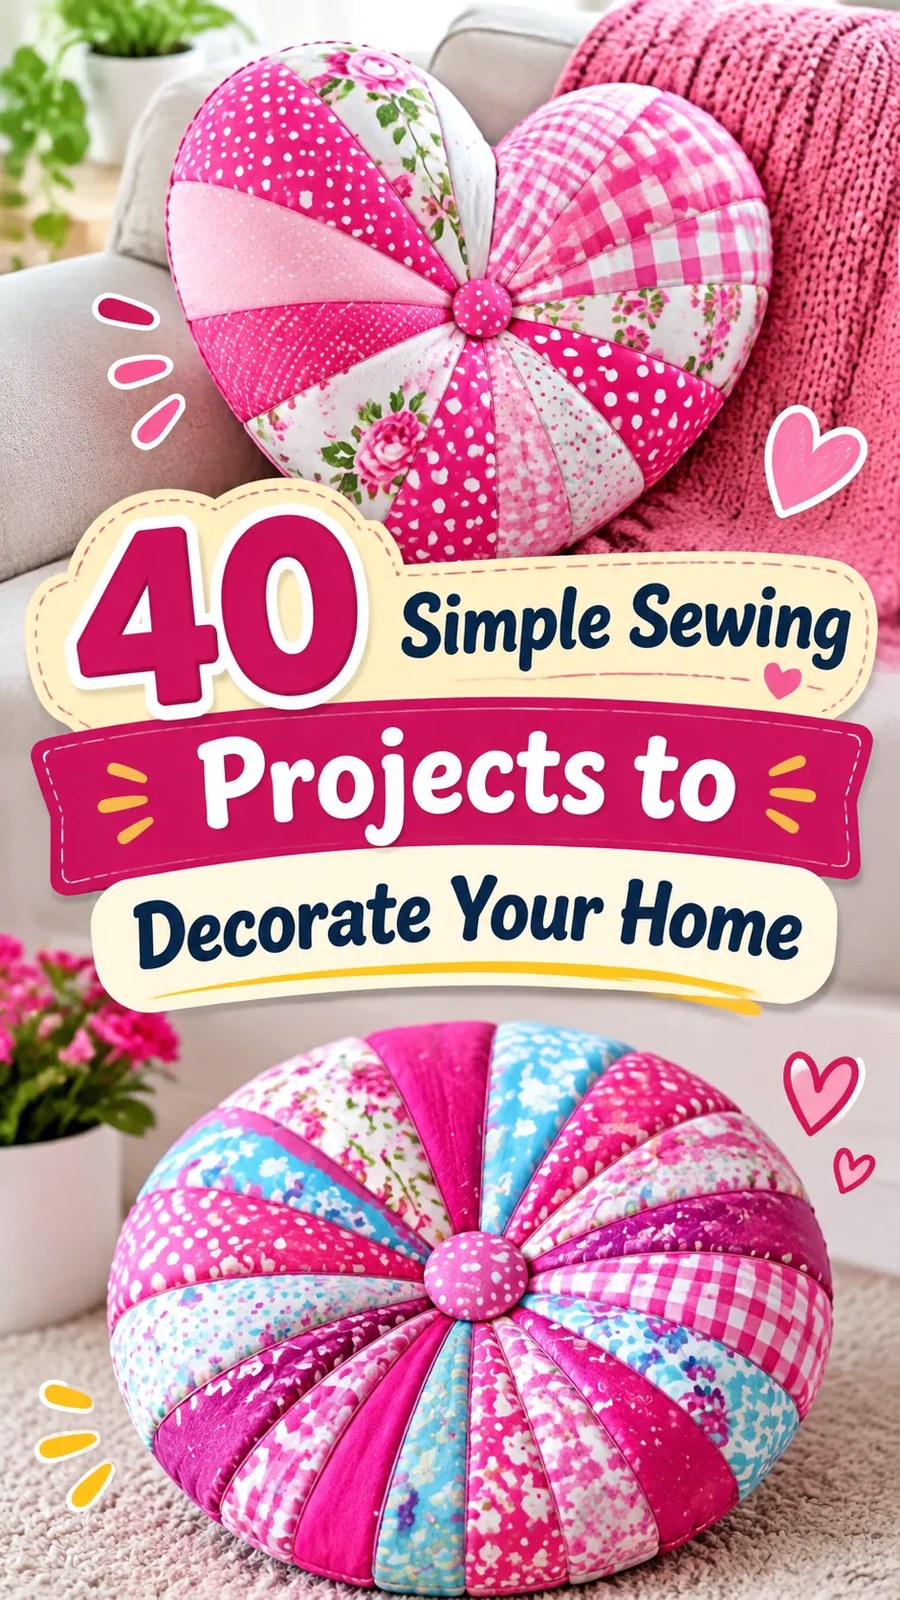
Bring a cheerful burst of color into your home with a beautiful handmade patchwork pillow! These decorative sewing pillows combine playful fabric prints, bright colors, and simple geometric construction to create eye-catching cushions that look wonderful on sofas, beds, reading chairs, and cozy window seats. The design features narrow fabric sections arranged like the spokes of a wheel, with their pointed ends meeting at a decorative covered button in the center.
The inspiration includes colorful round and heart-shaped patchwork cushions made with a mixture of floral, polka dot, gingham, striped, and patterned fabrics. For this original sewing tutorial, we will focus on a round radial patchwork pillow. It uses individual wedge-shaped fabric sections joined together to form a circular cushion cover, making it a wonderful way to use coordinating fabric scraps.
This DIY patchwork pillow is a rewarding project for anyone who enjoys creative sewing, colorful home accessories, and handmade gifts. The construction involves accurate piecing, curved-edge finishing, a practical zipper closure, and decorative button tufting. With careful cutting and pressing, you can create a charming cushion that adds personality to almost any room.
Key Takeaways
- Create a colorful round patchwork pillow using 16 individual fabric wedges.
- Combine floral, geometric, striped, gingham, and polka dot cotton fabrics for a playful appearance.
- Use accurate wedge piecing to create the distinctive radial arrangement.
- Add a fabric-covered center button for a decorative tufted finish.
- Install a zipper in the back for easy access to the pillow insert.
- Customize the cushion with different fabrics, colors, and sizes to suit your home decor.
Colorful Patchwork Pillow Sewing Ideas
Understanding the Decorative Pillow Design
The main cushion design is a round decorative pillow featuring multiple fabric sections that radiate outward from a small central point. Rather than using one large piece of fabric for the front, the cover is assembled from individual wedge-shaped sections.
Each wedge contributes to the circular shape. When the sections are sewn together along their long edges, their narrow ends meet in the middle while their wider curved edges create the outside circumference.
The fabric arrangement is particularly attractive because it allows several prints to work together without making the finished pillow look overly busy. Bright pinks, soft pastels, florals, stripes, gingham checks, and polka dots create an interesting combination of textures and patterns.
A decorative covered button sits at the center, concealing the small point where the wedge seams meet and giving the cushion its distinctive gathered appearance.
The coordinating heart-shaped cushion visible in the design uses a different overall silhouette. The round pattern in this tutorial offers a simpler, clearly defined construction method that captures the colorful radial patchwork effect without requiring a complicated heart-shaped template.
Project Category and Intended Use
This project belongs to the home decor and decorative cushion category. It is designed primarily as a soft decorative accessory rather than a structured or load-bearing item.
The finished round pillow works beautifully as:
- A colorful accent cushion for a living room sofa.
- A decorative pillow for a bedroom or guest room.
- A cheerful addition to a reading nook.
- A handmade gift for sewing enthusiasts.
- A playful accessory for a craft room or creative workspace.
- A seasonal decorating project using themed fabric collections.
Because the design uses relatively small fabric sections, it is also an excellent opportunity to use leftover quilting cotton and other compatible woven fabric scraps.
Fabric Selection and Construction Techniques
Recommended Fabric Types
The most practical fabric choice for this patchwork cushion is medium-lightweight woven cotton. Quilting cotton is particularly suitable because it is easy to cut accurately, presses neatly, and comes in many coordinating colors and prints.
For a similar decorative appearance, choose fabrics with a relatively firm hand and limited stretch. The wedge sections need to maintain their shape as they are joined together. Fabric that stretches easily can distort the pointed center and produce an uneven outer circle.
Suitable choices include:
- Quilting cotton: Ideal for colorful patchwork and accurate piecing.
- Poplin: A smooth woven fabric that creates a neat, lightweight cushion cover.
- Cotton-linen blends: Useful for adding a slightly textured appearance.
- Lightweight canvas: Suitable for a firmer decorative cushion, provided the sewing machine can handle the layers.
- Prewashed cotton remnants: A practical choice for mixing different prints and using fabric scraps.
Avoid very stretchy jersey, loosely woven fabrics, and extremely thick upholstery textiles for the first version. These materials make it harder to join 16 narrow sections accurately.
Understanding the Radial Patchwork Construction
The front is created using 16 wedge-shaped panels. Each wedge has two straight sides and one curved outer edge. The straight sides are sewn together with neighboring wedges, creating a complete circular front.
The simplest approach is to draft one wedge pattern, cut 16 fabric sections, and arrange them around the center. You can use eight different fabrics twice, 16 different prints, or a smaller selection repeated in a planned sequence.
For the back, two semicircular fabric panels are joined along their straight edges using a zipper. This creates a removable cover that can be taken off for cleaning.
The center button is attached after the front and back are assembled. Strong upholstery thread passes through the cushion and connects the front and back buttons, creating a small decorative indentation.
Construction Tip:
The accuracy of the radial layout depends on consistent wedge widths and seam allowances. Mark the seamlines carefully, sew slowly toward the center point, and press each seam before attaching the next section.
Needle, Thread, and Sewing Machine Settings
For medium-weight quilting cotton, use a universal sewing machine needle in size 80/12. A size 90/14 needle is a reasonable alternative for slightly heavier fabric or several layers.
Choose good-quality all-purpose polyester thread. Polyester provides useful strength for the cushion seams and works well with most cotton and cotton-blend fabrics.
Recommended starting machine settings include:
- Needle: Universal 80/12 or 90/14.
- Thread: All-purpose polyester.
- Stitch type: Straight stitch.
- Stitch length: Approximately 2.5 mm for patchwork seams.
- Outer assembly seam: Approximately 2.5 to 3 mm.
- Zipper stitching: Straight stitch, approximately 2.5 mm.
- Seam allowance: 1/4 inch for wedge seams and 1/2 inch for the outer cushion seam.
Always test the needle, thread tension, and stitch length on fabric scraps before starting the main construction.
Free Sewing Pattern: Round Radial Patchwork Pillow
Free Sewing Pattern
Original project: Colorful 16-Wedge Patchwork Accent Pillow
This original interpretation uses 16 individual fabric wedges to create a circular cushion front, two semicircular back sections with a zipper, and decorative buttons on both sides. The suggested dimensions are designed for a round pillow approximately 16 inches (40.6 cm) in diameter.
The construction measurements below use inches as the primary drafting system. Centimeter conversions are rounded for convenient measuring, so use one measurement system consistently when drafting and cutting.
| Pattern Detail | Specification |
|---|---|
| Skill level | Confident beginner to intermediate |
| Estimated sewing time | 3 to 5 hours, excluding preparation and drying time |
| Finished diameter | 16 inches (40.6 cm) |
| Finished shape | Round |
| Main fabric | Medium-lightweight woven cotton |
| Patchwork fabric quantity | Approximately 1 yard (0.91 m) total, assorted prints |
| Back fabric | Approximately 3/4 yard (0.69 m) |
| Fabric width | 44 inches (112 cm) usable width |
| Needle | Universal 80/12 |
| Thread | All-purpose polyester |
| Wedge seam allowance | 1/4 inch (0.6 cm) |
| Outer seam allowance | 1/2 inch (1.3 cm) |
| Closure | One 14-inch (35.6 cm) zipper |
| Insert | Approximately 16-inch (40.6 cm) round pillow insert |
Materials and Sewing Supplies
- Approximately 1 yard (0.91 m) of assorted quilting cotton for the patchwork front.
- Approximately 3/4 yard (0.69 m) of cotton for the back panels.
- One 14-inch (35.6 cm) zipper.
- One 16-inch (40.6 cm) round pillow insert.
- Two fabric-covered buttons approximately 1 1/2 inches (3.8 cm) in diameter.
- Small amount of lightweight fusible interfacing for button reinforcement, if needed.
- All-purpose polyester sewing thread.
- Heavy-duty upholstery thread for button tufting.
- Hand-sewing needle suitable for upholstery thread.
- Universal sewing machine needle, size 80/12.
- Fabric scissors or rotary cutter.
- Cutting mat and quilting ruler.
- Measuring tape and sewing gauge.
- Fabric marking pen or chalk.
- Pins or sewing clips.
- Iron and pressing surface.
- Zipper foot and regular sewing machine foot.
Batting: No batting is required for the basic pattern. The pillow insert provides the necessary volume. If you want a slightly softer, quilted appearance, you can add a lightweight batting layer to the front, but the outer diameter and seam construction should be checked again before assembly.
Sewing Terminology and Abbreviations
- RS: Right side of the fabric, or the printed side.
- WS: Wrong side of the fabric.
- SA: Seam allowance, the fabric between the stitching line and raw edge.
- WOF: Width of fabric.
- Notch: A small marking used to align matching sections.
- Radial seam: A seam extending from the center toward the outer edge.
- Staystitching: A line of stitching that stabilizes an edge against stretching.
- Backstitching: A few reverse stitches used to secure the beginning and end of a seam.
Finished Dimensions and Pattern Layout
The finished cushion measures approximately 16 inches (40.6 cm) across. Its front and back are constructed to meet along a circular perimeter.
The front consists of 16 equal wedge sections. Each wedge occupies an angle of 22.5 degrees because 360 degrees divided by 16 equals 22.5 degrees.
To draft the wedge, first draw the stitching-line shape rather than immediately drawing the cutting line. This keeps the seam allowances consistent and makes the finished circumference easier to calculate.
Drafting One Patchwork Wedge
- Draw a straight vertical centerline measuring 8 inches (20.3 cm) from the center point to the outer edge. This is the seamline radius.
- At the center point, use a protractor to mark an angle of 22.5 degrees on each side of the centerline. The total angle between the two lines must be 22.5 degrees.
- Extend both radial seamlines to the 8-inch (20.3 cm) radius.
- Join their outer endpoints with a smooth curved line forming a circular arc centered on the wedge point.
- Mark a 1/4-inch (0.6 cm) seam allowance outside each straight radial seamline.
- Mark a 1/2-inch (1.3 cm) seam allowance beyond the curved outer seamline.
- Extend the allowance lines until they meet, creating the final wedge cutting outline.
- Mark the center point, the outer midpoint, and the grainline running along the wedge centerline.
The resulting pattern is a wedge-shaped sector with a slightly wider cutting outline than the seamline shape. The seamline radius remains 8 inches (20.3 cm), so the assembled front measures approximately 16 inches (40.6 cm) across before the outer seam is sewn.
Label the pattern piece clearly and use it to cut all 16 sections. The pattern should be placed on the fabric with the centerline parallel to the lengthwise grain whenever practical.
Drafting the Back Semicircle Panels
The back uses two matching semicircles. Each half forms one side of the circular cushion back and has a straight center edge where the zipper is installed.
- Draw a circle with a diameter of 17 inches (43.2 cm).
- Draw a straight line through the center to divide the circle into two equal semicircles.
- Cut along the diameter to create two matching half-circle patterns.
- Mark a 1/2-inch (1.3 cm) seam allowance around each curved outer edge.
- Mark a 5/8-inch (1.6 cm) seam allowance along each straight center edge for the zipper installation.
- Mark the midpoint of each curved edge and the center end of each semicircle.
- Label one piece Back A and the other Back B.
The zipper seam joins the two straight edges. The finished back will have a 16-inch (40.6 cm) diameter after the curved outer seam allowance is sewn.
Complete Cutting List
| Pattern Piece | Material | Quantity | Cut Dimensions | Grainline and Allowance |
|---|---|---|---|---|
| Radial wedge | Assorted quilting cotton | 16 | Use the drafted 22.5-degree wedge pattern, 8-inch seamline radius | Centerline parallel to lengthwise grain; 1/4-inch side and 1/2-inch outer allowances included |
| Back semicircle A | Back cotton | 1 | Half of a 17-inch (43.2 cm) circle | Straight edge on lengthwise grain; 1/2-inch curved and 5/8-inch straight allowances included |
| Back semicircle B | Back cotton | 1 | Half of a 17-inch (43.2 cm) circle | Mirrored orientation; same allowances as Back A |
| Button covers | Coordinating cotton | 2 | Follow the button manufacturer’s covering template | Allow enough fabric for the button’s wrapping mechanism |
The patchwork quantity of approximately 1 yard (0.91 m) is a suggested total for assorted prints, assuming a usable fabric width of 44 inches (112 cm). Because the wedge pieces have curved and angled edges, the actual amount depends on the placement of the pattern pieces and the number of prints used. Buy additional fabric if the prints have a one-way design or require matching.
The back fabric estimate of 3/4 yard (0.69 m) also assumes a usable width of approximately 44 inches (112 cm). The two semicircle pieces should be arranged together on the fabric with their straight edges close to one another to reduce waste.
Preparing the Fabrics
- Wash the cotton fabrics according to their care instructions.
- Dry and press them before cutting to reduce the risk of later shrinkage.
- Inspect the fabrics for flaws, stains, and damaged areas.
- Arrange the prints on a flat surface and decide on the color sequence.
- Press each fabric flat without stretching the edges.
- Check the grainline of each piece before cutting.
- Transfer the center points and alignment marks using a removable fabric marking tool.
For a balanced appearance, alternate large floral prints with smaller patterns. Avoid placing several very busy prints next to each other if you want the individual wedges to remain visually distinct.
Step-by-Step Sewing Instructions
Step 1: Arrange the 16 Wedges
Place the 16 cut wedge sections on a large flat surface with their right sides facing upward. Arrange them in a circular sequence so that the narrow ends meet in the center and the curved outer edges form a complete circle.
Try different combinations until the colors and prints look balanced. If you are using eight fabrics, place each print twice in opposite or evenly spaced positions.
Number the wedges from 1 to 16 using small removable labels. This prevents accidental changes to the layout during sewing.
Check that the pointed ends all face the same central location. The curved outer edges should form an even circle without gaps or overlapping sections.
Step 2: Sew the First Patchwork Sections
Place wedge 1 and wedge 2 together with their right sides facing each other. Align one pair of long straight edges, matching the narrow center points and the outer ends.
Pin the full length of the seam. Begin stitching at the narrow center point and sew toward the curved outer edge using a 1/4-inch (0.6 cm) seam allowance.
Backstitch lightly at the beginning and end. Avoid pulling the fabric as it passes under the presser foot.
Open the seam and press it to one side. For a neater result, press successive seams in alternating directions to reduce bulk.
Continue joining the wedges in pairs until you have eight paired sections.
Step 3: Join the Patchwork Pairs
Place two paired sections right sides together, matching their long straight edges. Carefully align the center point where the four wedge sections will meet.
Insert a pin directly through the marked center point on both sections. Add more pins along the remaining seam to keep the edges aligned.
Sew with a 1/4-inch (0.6 cm) seam allowance, stitching from the center toward the outer edge. Repeat this process to connect the remaining paired sections until you have four larger patchwork sections.
Press the seams gently, keeping the center area as flat as possible.
Step 4: Complete the Circular Front
Join the four larger sections in the same manner, placing the right sides together and matching the center intersections carefully.
Pin the radial seams from the center point toward the outer edge. Sew each joining seam with a 1/4-inch (0.6 cm) allowance.
As the seams approach the center, reduce your sewing speed. Keep the stitching lines accurate so the center does not develop a large hole or an uneven cluster of fabric.
Once all sections are joined, open the front and inspect the overall circular shape.
Press the seams in alternating directions where possible. If the center becomes too bulky, carefully trim the seam allowance layers in small increments without cutting the stitching.
Check the distance from the center to the outer seamline. It should measure approximately 8 inches (20.3 cm) at several points around the circle.
Step 5: Stabilize and Trim the Front
Lay the patchwork front flat with the right side facing upward. Check that the outer edge is smooth and that the center point is reasonably flat.
If any outer sections extend unevenly, use the original 16-inch (40.6 cm) finished circle seamline as a guide. Measure from the center to several points around the circumference and make small corrections while preserving the 1/2-inch (1.3 cm) outer seam allowance.
Staystitch around the circular outer edge approximately 1/4 inch (0.6 cm) from the raw edge if the fabric is likely to stretch during handling. Use a stitch length of approximately 2.5 mm.
Step 6: Prepare the Back Zipper
Take Back A and Back B and place them with their right sides facing upward. Their straight center edges will form the zipper opening.
Fold and press a small section of each straight edge toward the wrong side to establish the 5/8-inch (1.6 cm) seam allowance.
Position the 14-inch (35.6 cm) zipper between the two panels, aligning its teeth with the center opening. The zipper should be centered along the straight seam, leaving approximately 1 1/2 inches (3.8 cm) of unzipped fabric at each end.
Pin or clip the zipper tape in place. Use a zipper foot to stitch one side of the zipper tape to Back A, keeping the stitching close to the zipper teeth without catching them.
Repeat on Back B. Check that the two curved outer edges align evenly and that the zipper opens and closes smoothly.
Close the zipper before proceeding to the next stage. The zipper seam should now connect the two semicircles into one complete back panel.
