

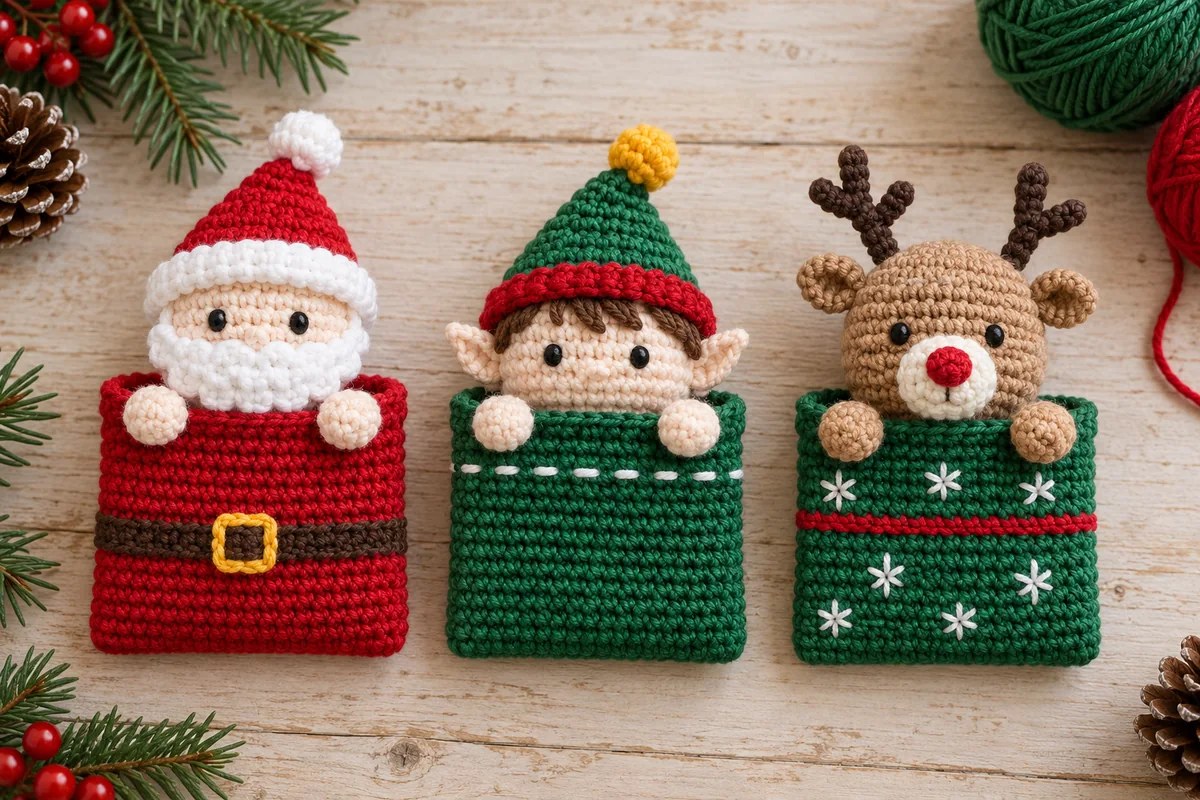
These crochet Christmas gift pockets combine a small folded pouch with a round character head and two little hands resting on the front edge. Santa, an elf and a reindeer share the same basic pieces, so you can choose one character or make a coordinated trio.
The pocket stays open behind the hands. A note or a small wrapped surprise can slide inside, while the stuffed head is sewn to the back rim. Embroidered belts, stars and running stitches give the simple rectangles their present-like finish.
This version uses compact single-crochet shapes and separate accessories rather than full doll bodies. For another small seasonal gift decoration, the flat crochet gingerbread man can be sewn onto a fabric bag.
How these crochet Christmas gift pockets are built
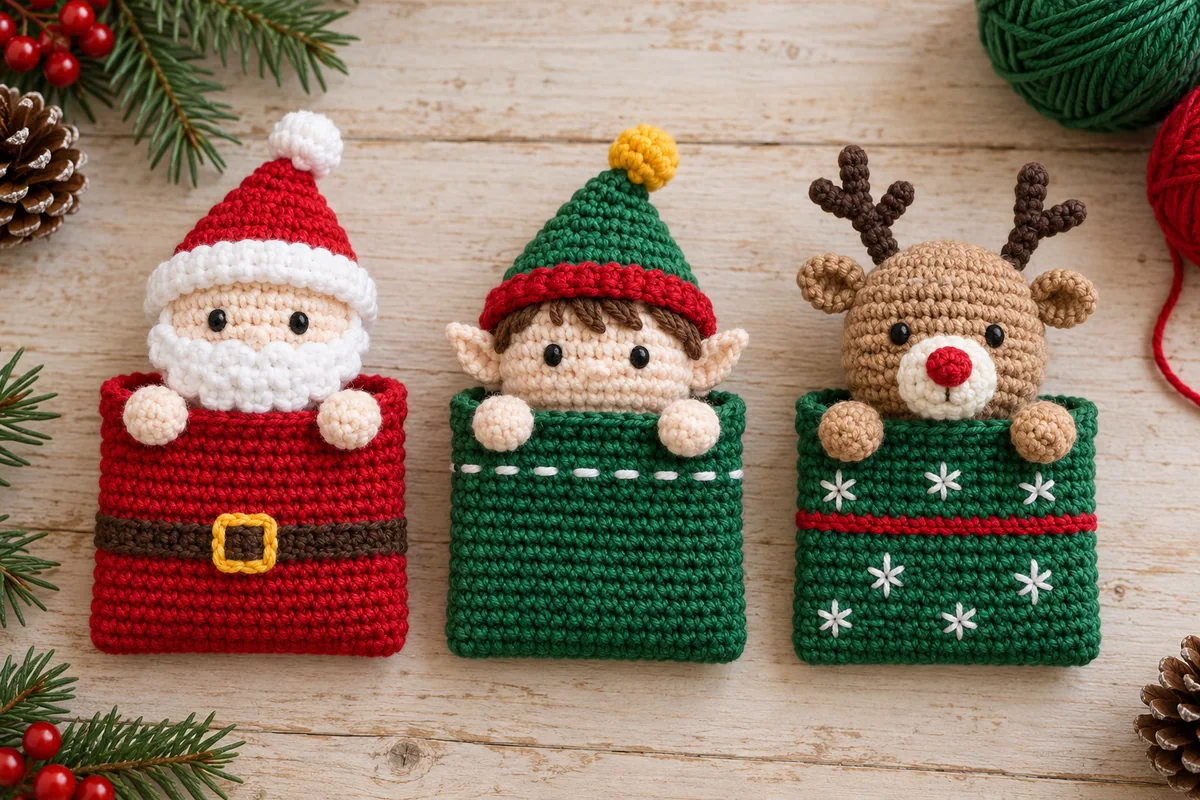
This is an original interpretation inspired by the reference characters with presents, not the exact pattern behind that photograph. The written design makes soft, flat pockets from folded rectangles; it does not use rigid cube-shaped boxes. Each pal needs one pocket, one stuffed head and two hands, followed by the accessories for the chosen character.
The stitch arithmetic has been checked, but the design has not been physically tested. No measured gauge, finished dimensions or yarn consumption is supplied. Make one pocket and head first to assess their proportions in your yarn. The styling photographs show the intended look; follow the written counts and construction below.
Materials and colors
- Smooth yarn of the same weight in red, green, cream, tan, brown, white, yellow and a little black for embroidery. Choose only the colors needed for your character.
- A suitable hook that makes a firm single-crochet fabric. A 2.5–3 mm hook is a starting suggestion for light yarn, adjusted to the yarn label and your fabric.
- Fiberfill for the head and hands; do not fill the pocket.
- A blunt yarn needle, scissors and a removable marker for the first stitch of each round.
Use cream for Santa and the elf’s head and hands, and tan for the reindeer’s. Santa has a red pocket; the elf and reindeer have green pockets. The instructions use embroidered eyes. Keep the fabric close enough that stuffing does not show between the stitches, while allowing the pocket rectangle to fold.
US terms and counting conventions
ch = chain; sc = single crochet; dc = double crochet; inc = 2 sc in one stitch; dec = sc2tog, joining two stitches into one; sl st = slip stitch; MR = magic ring; st/sts = stitch/stitches. The Craft Yarn Council abbreviation guide is a useful reference for standard US terminology.
Work the head, hands, hat and muzzle in continuous rounds without turning. Move the marker to the first stitch of each new round; do not add joins or beginning chains between those rounds. When starting an MR, ch 1 before the first sc; that chain does not count. The pocket and beard are worked back and forth. Their turning chains never count as stitches.
For a dec, insert the hook in the next stitch and pull up a loop, insert in the following stitch and pull up another loop, then yarn over and draw through all three loops. You can use an invisible decrease through the two front loops instead; the count remains one stitch made from two.
Shared pocket: one rectangle, folded in half
Use red for Santa or green for the elf or reindeer. Ch 13.
Row 1: Sc in the second chain from the hook and in each remaining chain. 12 sc.
Rows 2–16: Ch 1, turn, sc in each of the 12 stitches. 12 sc per row. Fasten off with a sewing tail. There are 192 sc in the completed rectangle, excluding the foundation and turning chains.
Fold between Rows 8 and 9 so Row 1 and Row 16 become the two upper edges. Match the row ends at both sides. Whipstitch the two side seams, catching one corresponding row end from each layer at a time, for eight matched row-end pairs per side. The folded edge is the bottom; leave both top edges unjoined.
Do not add a crochet edging or stuff the pouch. The neat upper edges come from the existing first and last rows. Check that the opening accepts the note or wrapped item you intend to use before adding the character.
Shared head: make one per pal
Use cream for Santa or the elf, or tan for the reindeer. Start with an MR and ch 1.
| Round | Instruction | Count |
|---|---|---|
| 1 | 6 sc in MR | 6 |
| 2 | Inc in each st | 12 |
| 3 | (Sc, inc) 6 times | 18 |
| 4 | (Sc 2, inc) 6 times | 24 |
| 5–7 | Sc in each st for three rounds | 24 each |
| 8 | (Sc 2, dec) 6 times | 18 |
| 9 | (Sc, dec) 6 times | 12 |
| 10 | Dec 6 times | 6 |
Pause after Round 8, before stuffing, to embroider two black eyes across the front between Rounds 5 and 6, leaving roughly four stitch columns between them. Work a few short passes in the same place for each eye, securing the ends inside. Add an optional small stitched smile below. Mark the face center so you can keep the hat, beard or muzzle aligned.
Begin stuffing after Round 8. Add small amounts rather than forcing one large lump inside. Finish stuffing before Round 10, then fasten off with a sewing tail. Thread that tail through the front loops of the final six stitches and draw the opening closed. Keep the closure at the bottom, where it will meet the pocket’s back rim.
Shared hands: make two per pal
Use the head color. Round 1: MR, ch 1, 6 sc. Rounds 2 and 3: Sc in each of the 6 stitches. 6 sc each round; 18 sc per hand. Add only a tiny amount of stuffing, fasten off and pass the tail through the six front loops to close. Leave the tails for sewing. Make the second hand the same way.
The hands are small rounded tubes closed with a needle, not circles that need an increasing round. Extra stuffing will make their top edge look like a hard knot. Roll them gently between your fingers to distribute the filling.
Santa and elf: the shared cone hat
Use red for Santa’s hat or green for the elf’s. Start with an MR and ch 1. Keep working in a spiral.
| Round | Instruction | Count |
|---|---|---|
| 1 | 4 sc in MR | 4 |
| 2 | Sc in each st | 4 |
| 3 | (Sc, inc) twice | 6 |
| 4 | (Sc 2, inc) twice | 8 |
| 5 | (Sc 3, inc) twice | 10 |
| 6 | (Sc 4, inc) twice | 12 |
| 7 | (Sc, inc) 6 times | 18 |
| 8 | (Sc 2, inc) 6 times | 24 |
| 9 | Change to white for Santa or red for the elf; sc in each st | 24 |
Change color on the final yarn-over of the last stitch in Round 8, so Round 9 begins in the band color. Fasten off after Round 9 with a sewing tail. The hat stays unstuffed. Its 24-stitch opening matches the head’s widest count, but the actual fit depends on tension; check it before sewing.
