

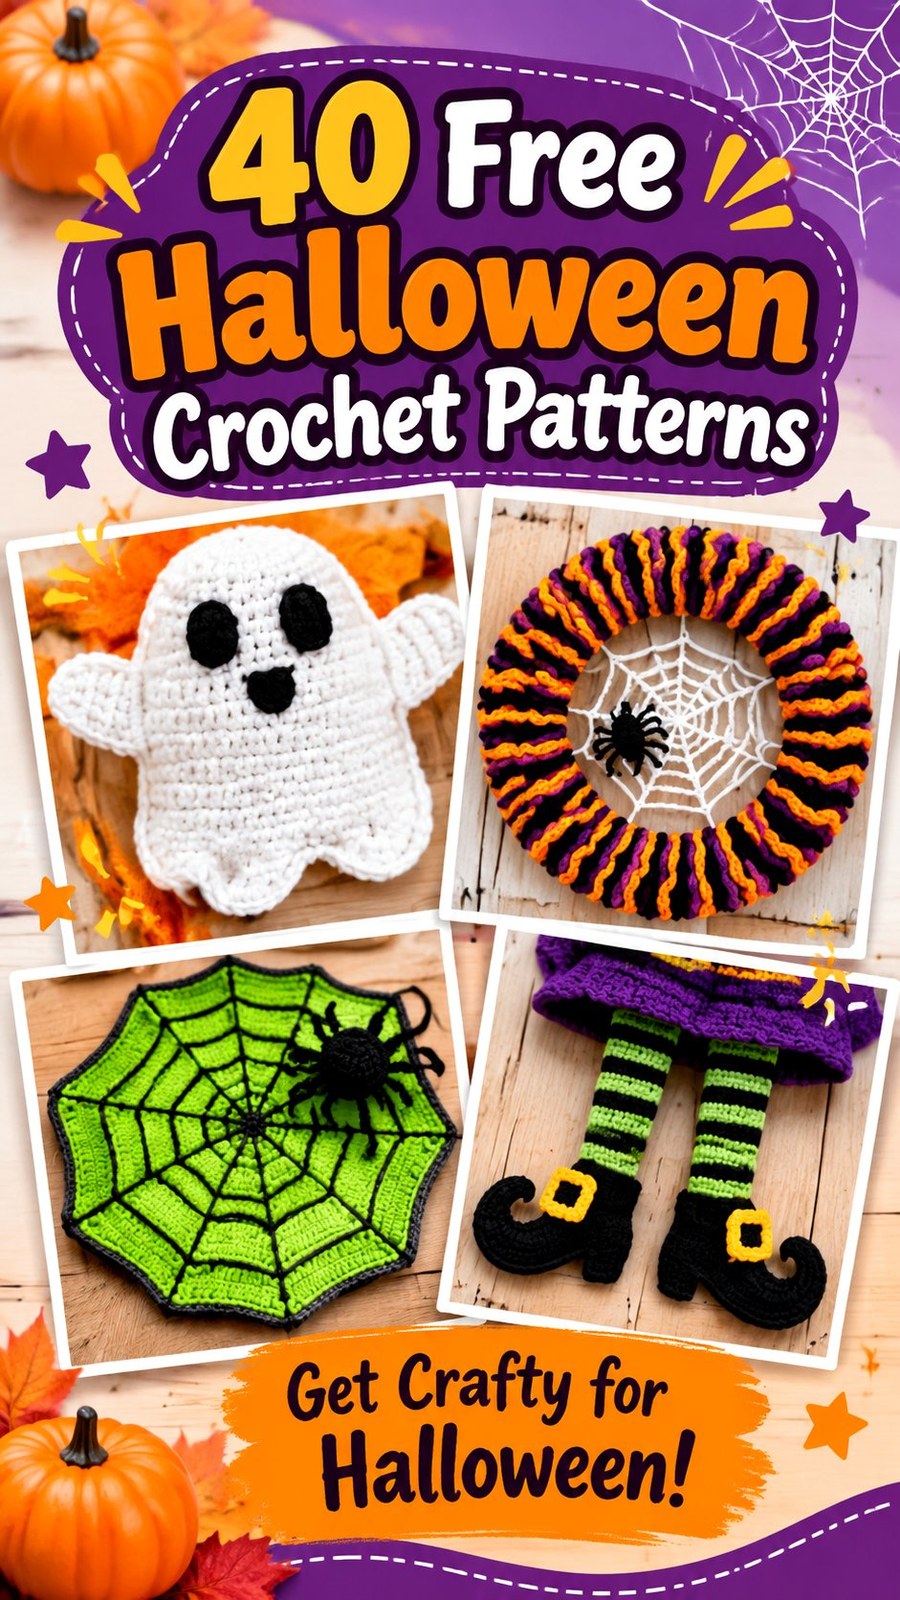
The body is now complete. The upper section forms the ghost’s rounded crown, while the straight rows create a simple, slightly elongated body.
Scalloped Ghost Bottom Edge
The decorative edging creates three soft waves along the bottom of the ghost.
With the right side facing, locate the 35 stitches across the final row.
Edging:
- Sl st into the first st.
- Work 1 hdc and 1 dc into the next st.
- Work 1 sl st into the next st.
- Work 1 dc and 1 hdc into the next st.
- Work 1 sl st into the next st.
- Work 1 hdc and 1 dc into the next st.
- Work 1 sl st into the next st.
- Work 1 dc and 1 hdc into the next st.
- Work 1 sl st into the next st.
- Work 1 hdc and 1 dc into the next st.
- Work 1 sl st into the next st.
- Work 1 dc and 1 hdc into the next st.
- Work 1 sl st into the next st.
- Work 1 hdc and 1 dc into the next st.
- Work 1 sl st into the next st.
- Work 1 dc and 1 hdc into the next st.
- Work 1 sl st into the next st.
- Work 1 hdc and 1 dc into the next st.
- Work 1 sl st into the next st.
- Work 1 dc and 1 hdc into the next st.
- Work 1 sl st into the next st.
- Work 1 hdc and 1 dc into the next st.
- Work 1 sl st into the next st.
- Work 1 dc and 1 hdc into the next st.
- Work 1 sl st into the next st.
- Work 1 hdc and 1 dc into the next st.
- Work 1 sl st into the next st.
- Work 1 dc and 1 hdc into the next st.
- Work 1 sl st into the next st.
- Work 1 hdc and 1 dc into the next st.
- Work 1 sl st into the next st.
- Work 1 dc and 1 hdc into the next st.
- Work 1 sl st into the final st.
FO, leaving a short tail for weaving in. This edging creates a repeating series of small waves along the bottom. For a more pronounced three-scallop appearance, gently shape the lower edge during blocking.
Face Embroidery
Use black yarn and a yarn needle to create two oval eyes and a small curved mouth.
- Lay the ghost flat with the right side facing upward.
- Position the eyes approximately 1 inch (2.5 cm) apart, around the upper-middle section of the head.
- Use several small horizontal embroidery stitches to form each eye.
- Place the mouth below the eyes, centered between them.
- Use a short curved line or a small oval to create a friendly expression.
- Secure the embroidery ends on the wrong side without pulling the stitches too tightly.
For a sleepy ghost, use short curved eyes. For a surprised ghost, embroider a small round mouth. A playful expression can be created with one slightly larger eye and a tiny stitched smile.
Optional Border Around the Ghost
For a cleaner silhouette, use white yarn to add a single round of slip stitches around the sides and top of the ghost.
- Join white yarn at the lower side of the ghost.
- Work one slip stitch into each available stitch along the side edges.
- At the top, work 2 slip stitches into the center crown stitch if needed to keep the edge smooth.
- Continue down the opposite side.
- Keep the scalloped bottom edge uncovered.
- Join with a slip stitch and fasten off.
Space the side stitches evenly rather than forcing a slip stitch into every row-end space if doing so makes the edge too tight.
Fastening Off and Finishing
- Cut the yarn, leaving a tail of approximately 4 to 6 inches (10 to 15 cm).
- Pull the yarn through the final loop.
- Thread the tail onto a yarn needle.
- Weave the end through several stitches on the wrong side.
- Trim excess yarn carefully.
- Check that the face embroidery and edging are secure.
The finished ghost should lie flat and have a clearly defined rounded crown and scalloped lower edge.
Customization Ideas and Size Adjustments
One of the best features of a crochet Halloween ghost is how easily the design can be personalized. Small changes to the yarn, facial embroidery, and finishing details can create completely different characters from the same basic pattern.
Make a Larger Ghost
To make a wider ghost, continue adding increase rows before beginning the straight body section. Each additional increase row adds 2 stitches to the total width.
For example, if you add two more increase rows after Row 17, the stitch count becomes 39 stitches. Continue with straight rows using 39 single crochet stitches per row.
To maintain a balanced appearance, add approximately two straight rows for every additional increase row. The finished height will depend on how many body rows you choose to include.
Make a Mini Ghost
For a smaller applique, stop the increasing section after Row 13, when you have 27 stitches. Work four or five straight rows and add the same decorative edging concept.
Use a smaller hook, such as 3.0 mm or 3.5 mm, with suitable yarn to create a compact decoration. Always check that the stitches remain easy to work.
Experiment with Halloween Colors
- Classic ghost: White yarn with black eyes and mouth.
- Pastel ghost: Lavender, pale pink, or mint green yarn with contrasting embroidery.
- Midnight ghost: Black or charcoal yarn with white facial details.
- Witchy ghost: White yarn with a small purple or orange crocheted hat.
- Glow-inspired ghost: Pale green yarn with dark facial embroidery.
You can also add a tiny bow, a crocheted star, or a small embroidered heart. Keep embellishments lightweight so the applique maintains its original shape.
Customization Tip:
If you plan to attach the ghost to a colorful blanket or bag, choose a yarn color that contrasts with the background. This makes the outline easier to see and gives the decoration more visual impact.
Common Crochet Mistakes and How to Fix Them
Even simple Halloween crochet patterns can present a few challenges. Paying attention to stitch placement and tension will help your ghost maintain a smooth silhouette.
Uneven Increases
If the ghost looks lopsided, check that both increases are worked into the first and last stitches of every increasing row. Missing one increase will reduce the stitch count and make the shape uneven.
Count your stitches after every row rather than waiting until the end of the project.
Curled Edges
Curled edges can result from tight tension or an unsuitable hook size. Try a slightly larger hook if the fabric feels stiff. A gentle blocking treatment can also help flatten the applique.
Uneven Scallops
The decorative bottom edge may look irregular if the taller stitches are not placed into the intended stitches. Follow the edging sequence carefully and avoid skipping spaces.
If the waves appear too large, use half double crochet instead of double crochet for a smaller decorative effect.
Facial Features That Look Misaligned
Before embroidering the face permanently, use removable stitch markers to identify the eye positions. Step back and check the spacing from a distance. Small adjustments can make a big difference to the ghost’s expression.
Finishing, Blocking, and Care Instructions
Finishing gives your crochet Halloween ghost a clean, professional appearance. Before attaching it to another project, make sure all yarn ends are securely woven in and the embroidery is firmly attached.
Blocking the Ghost Applique
Light blocking can improve the shape of the finished ghost. Gently arrange the crown and side edges, then smooth the scallops into an even line.
For acrylic yarn, use the care method recommended for the specific yarn rather than applying direct heat. Cotton yarn can generally be dampened lightly and pinned into shape if its care instructions permit.
Ways to Use Your Finished Ghost
- Blanket decoration: Sew the ghost onto a Halloween-themed throw.
- Gift bag accent: Attach it to a handmade treat bag or gift pouch.
- Seasonal garland: Make several ghosts and connect them with a crochet chain.
- Wall decoration: Add a small hanging loop at the top.
- Table decoration: Attach the applique to a seasonal table runner or decorative fabric.
- Halloween clothing: Sew it securely onto a jacket, sweatshirt, or tote bag.
Important Safety Note: For decorations intended for babies or children under three, avoid plastic safety eyes, beads, buttons, and other detachable parts. Embroidered facial features are a better option, but an applique is still a decorative item and should not be treated as an infant sleep accessory or automatically considered safe for unsupervised use.
Attaching the Applique
To attach the ghost to another crochet project, position it on the surface and pin it temporarily in place. Use a yarn needle and matching white yarn to sew around the outer edge with small, discreet stitches.
When attaching it to fabric, use a fine sewing needle and matching thread. Secure the corners and scalloped sections carefully so the applique does not lift during normal handling.
Washing and Storage
Follow the care instructions for your chosen yarn. If the ghost is attached to a larger project, follow the care requirements of the least washable material in the finished item.
- Wash gently when the yarn permits.
- Avoid harsh detergents and excessive agitation.
- Reshape the applique while damp.
- Allow it to dry completely before storing.
- Keep seasonal decorations in a clean, dry container between Halloween seasons.
More Halloween Crochet Projects to Try
Once you finish the ghost applique, you can expand your seasonal crochet collection with other decorations inspired by classic Halloween imagery. Mixing different shapes, textures, and colors creates a coordinated handmade display.
Crochet Spiderweb Decorations
Spiderweb motifs are excellent for Halloween decorating. A web can be made using chains and connecting stitches to create open spaces and radiating lines. Use black, gray, or neon green yarn to create a dramatic effect.
Small webs can be used as coasters, wall accents, or decorative patches. Larger motifs can become table mats or window decorations.
Colorful Halloween Wreaths
A crocheted wreath cover is a fun way to introduce Halloween colors into your home. Purple, orange, and black stripes create a recognizable seasonal combination. Add small spiders or ghost motifs for extra personality.
Crochet Pumpkins
Mini crochet pumpkins are useful for autumn displays and handmade seasonal gifts. They can be worked in rows or rounds and shaped with gathering stitches. Orange yarn, a brown stem, and a small green leaf create a classic pumpkin appearance.
Spooky Crochet Accessories
For something wearable, consider striped scarves, leg warmers, fingerless mitts, or small Halloween-themed bags. Combining purple and black or orange and black creates a bold seasonal look without requiring complicated stitch patterns.
At a Glance: Crochet Halloween Ghost Applique
- Best yarn: Worsted-weight acrylic or cotton in white or ivory.
- Skill level: Easy, with basic single crochet and increase techniques.
- Key technique: Flat row construction with gradual increases and a scalloped edge.
- Size adjustment: Add or remove increase rows and straight body rows.
- Finishing: Embroidered facial features, neat edging, and gentle blocking.
Create Your Own Spooky Crochet Collection
Halloween crochet projects are a lovely way to bring creativity and seasonal personality into your home. From colorful wreaths and spiderweb decorations to adorable ghosts and little pumpkins, there are countless ways to turn simple yarn into festive handmade pieces.
This crochet Halloween ghost applique is a great starting point if you enjoy small projects with plenty of customization possibilities. Its rounded silhouette, compact single crochet fabric, and decorative scalloped edge create a recognizable ghost shape without complicated construction.
Before beginning, choose your yarn, check your tension, and read through the complete pattern so you understand how the increases and edging work. Experiment with different facial expressions, seasonal colors, and decorative details to make each ghost unique.
Whether you create one little ghost for a gift or several to decorate your home, this free crochet pattern offers a fun way to celebrate the spooky season with handmade charm. Gather your favorite yarn and crochet hook, enjoy the process, and start building a Halloween collection that reflects your own creative style!
Tags
Halloween Crochet
Crochet Ghost Pattern
Ghost Applique
Free Crochet Pattern
Spooky Crochet
Halloween Decorations
Easy Crochet Projects
Crochet Applique Patterns
