

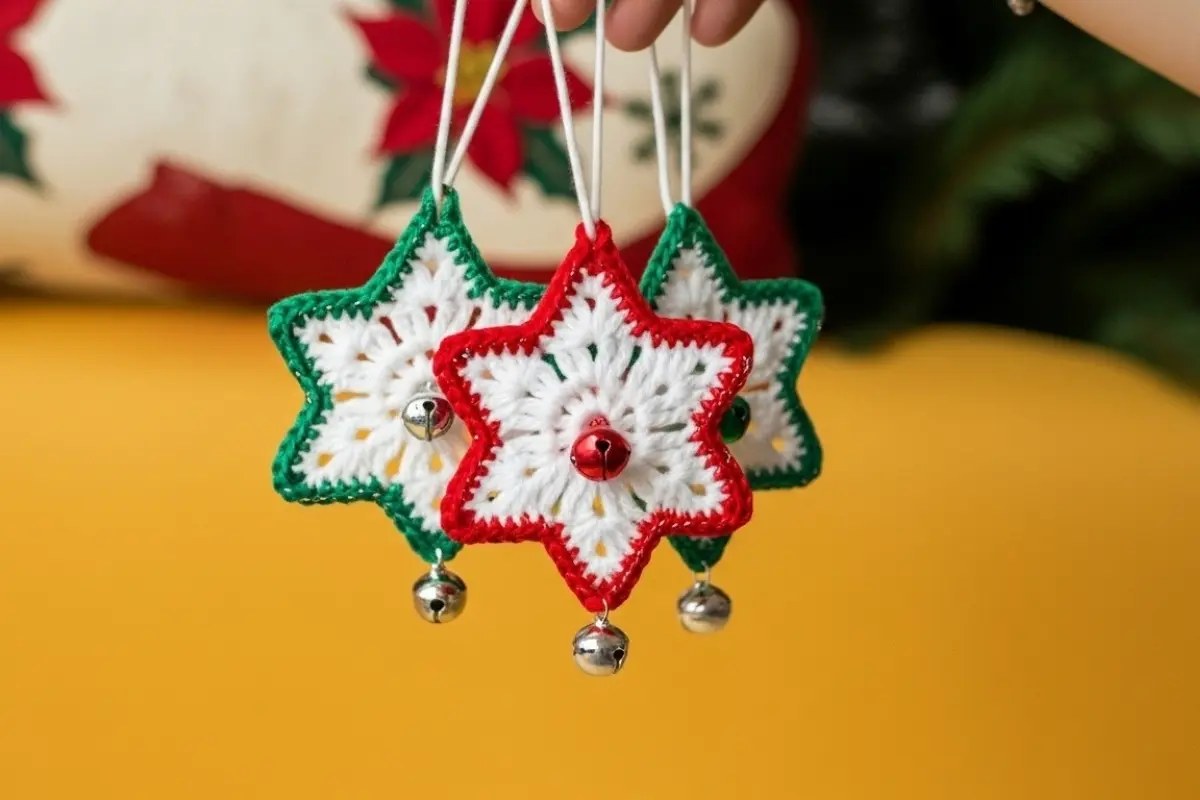
There’s something magical about decorating your home with pieces you made by hand—especially during the holidays. This Christmas Star Crochet Pattern brings that warm, nostalgic feeling to life with a design that’s both simple and beautifully detailed. Whether you’re making it for your own tree, gifting it to a friend, or adding a handmade touch to your holiday decor, this crochet star adds charm, sparkle, and personality to any space.
What makes this pattern extra special is how quickly it works up, yet feels so meaningful when finished. The soft white center, the delicate shaping of each point, and that gentle shimmer from the silver edging come together to create an ornament that truly stands out. Even better: it’s the kind of project you’ll want to make again and again—because once people see yours, they’ll ask for one too.
Let’s bring this festive Christmas Star Crochet Pattern to life!

🧶 What You’ll Need
Here’s everything you’ll need to make your beautiful handmade star:
Yarn: Medium weight yarn (cotton or acrylic) in white or your preferred main color
Contrast Yarn: Fine silver metallic yarn OR a second strand of silver cotton/acrylic for the edging
Hook: Size G/6 – 4.0mm (adjust if needed for your yarn choice)
Notions: Tapestry needle, scissors
Embellishment: One small bell (0.5–0.6 in / 1–1.5 cm) with a loop for hanging
This combination creates a soft, structured star with a festive touch—classic, elegant, and eye-catching.
🧵 Abbreviations (US Terms)
ch – chain
st(s) – stitch(es)
sl st – slip stitch
sc – single crochet
hdc – half double crochet
dc – double crochet
tr – treble crochet
inc – increase (2 stitches in the same stitch)
prev – previous
rep – repeat
FO – Fasten Off
Rnd – Round
⭐ Christmas Star Crochet Pattern
Center Circle (White Yarn)
Start with the white yarn.
Rnd 1: Make a magic ring (or ch 4, sl st to join). Ch 3 (counts as 1 dc), 11 dc into the ring. Sl st to the top of the initial ch 3 to join. (12 dc)
Rnd 2: Ch 3 (counts as 1 dc), 1 dc in the same st (inc made). Make 2 dc in each st around. Sl st to the top of the initial ch 3 to join. (24 dc)
Rnd 3: Ch 3 (counts as 1 dc), 1 dc in the same st (inc made), 1 dc in the next st. 2 dc in the next st, 1 dc in the next st. Rep from * to * around. Sl st to the top of the initial ch 3 to join. (36 dc)
Forming the Star Points
You will now create 6 points by working in short rows over the sts of Rnd 3.
Point 1:
Row 1: Sl st in the next 2 sts of Rnd 3. Ch3(countsas1dc),1dcinthenext5stsCh 3 (counts as 1 dc), 1 dc in the next 5 stsCh3(countsas1dc),1dcinthenext5sts. (6 dc) Turn.
Row 2: Ch 3 (counts as 1 dc), 1 dc in the next 5 sts. (6 dc) Turn.
Row 3: Ch 3 (counts as 1 dc), 1 dc in the next 5 sts. (6 dc) Turn.
Row 4 (Creating the Peak):
Ch 2 (does not count as st), 1hdc,1dc,1tr,1dc,1hdc1 hdc, 1 dc, 1 tr, 1 dc, 1 hdc1hdc,1dc,1tr,1dc,1hdc in the first st.
Sl st in the next st. 1hdc,1dc,1tr,1dc,1hdc1 hdc, 1 dc, 1 tr, 1 dc, 1 hdc1hdc,1dc,1tr,1dc,1hdc in the next st.
Rep from * to * until the end. Sl st into the last st.
